- Home
- Social Media
- Increase Website Traffic With Your Own LinkTree
WordPress Tutorial
Increase Website Traffic With Your Own LinkTree

Having all of your links on one easy-to-see page is especially important on Instagram, where you can only include 1 link in your bio. LinkTree is a free webpage that allows you to display multiple links in a mobile-friendly format that’s perfect for social media.
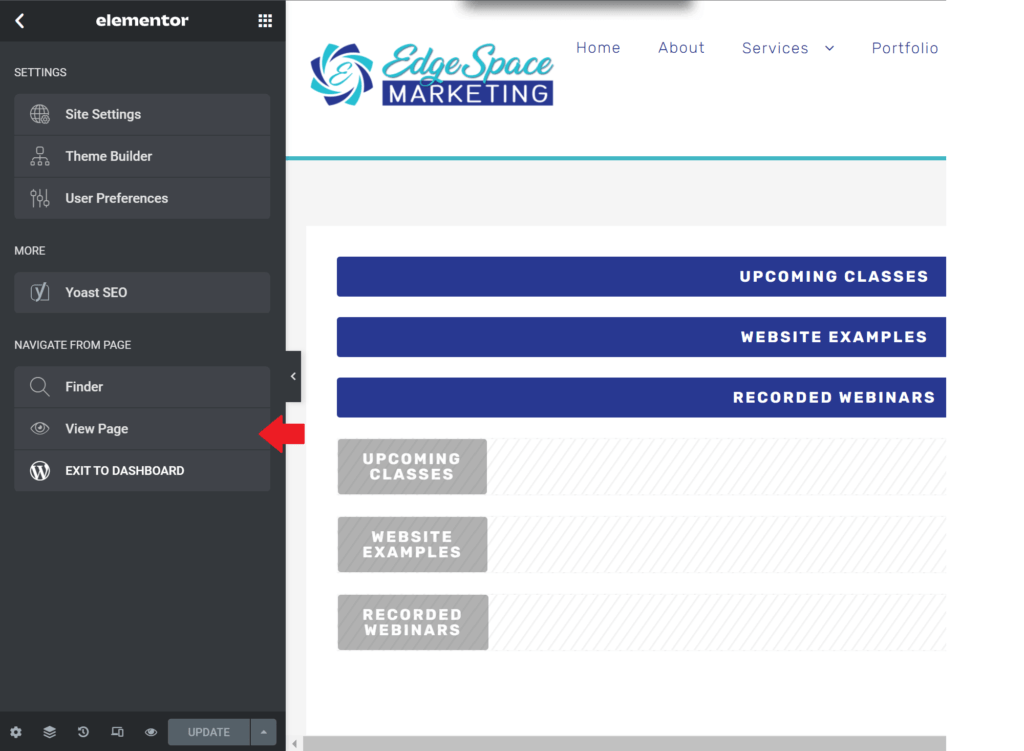
When you use LinkTree or a similar website, you’re giving away precious web traffic to a 3rd party. We recommend that you take the time to create your own LinkTree on your website. Here is how we are using our own LinkTree for EdgeSpace’s social media accounts.
There are several benefits to creating a dedicated page on your own website:
- You are directing all of the traffic to your website
- Visitors are more likely to explore your website and get to know you better
- You increase your chances of conversions
The good news is it’s super easy to create your own LinkTree on your blog or website, and you don’t need any fancy HTML or CSS skills.
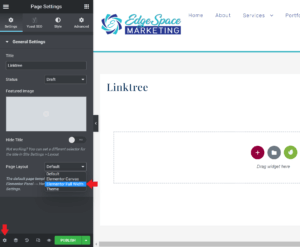
Elementor with Classic Editor
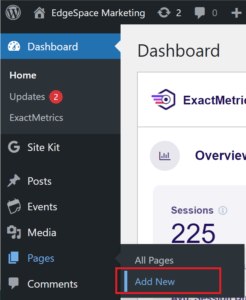
Create Your Own Linktree on WordPress
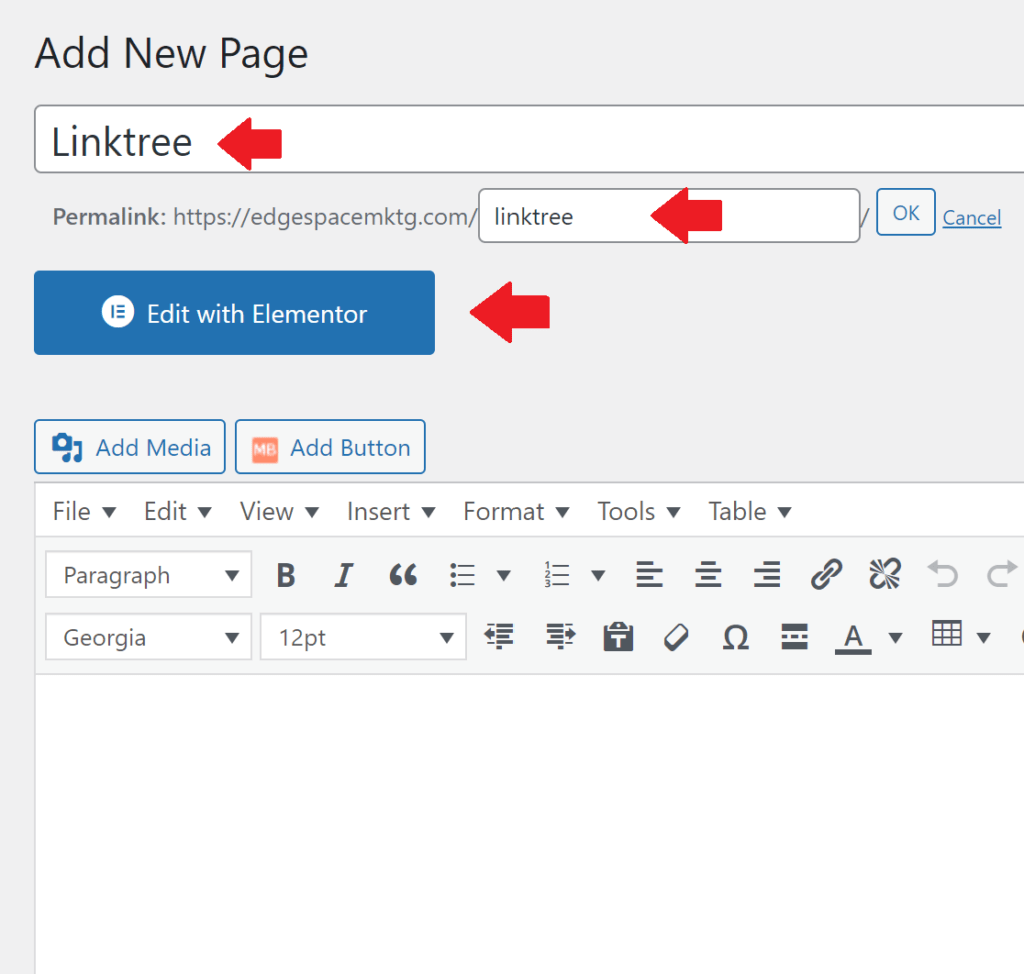
Step 2: Edit your Page Name and Slug
You want to keep it simple. I recommend using something like “links” or “linktree” so you’ll remember it quickly and easily.
Your slug is not the same as the page name. Your slug is what appears after the website domain. Example: www.website.com/this-is-your-slug
Then click Edit with Elementor
Step 4: Add New Section
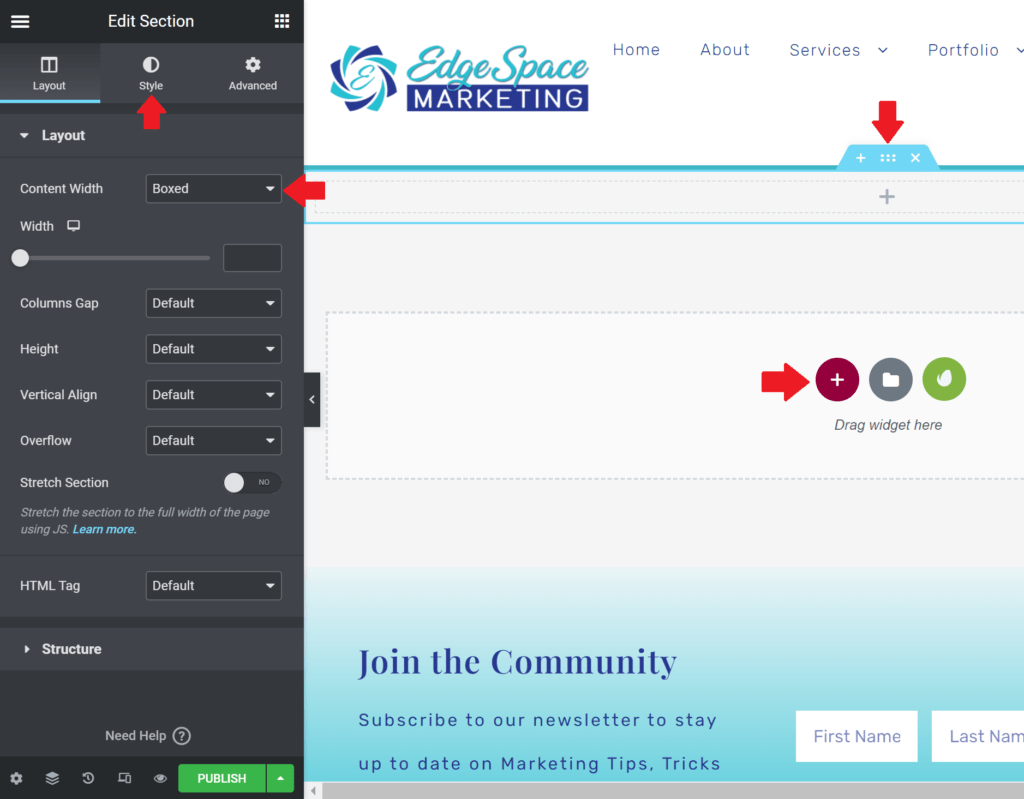
Click the plus icon in the center of the page to add a new section with 1 column.
Hover over the new section and right-click the middle of the blue handle that appears. Click Edit Section from the menu that appears.
In the panel on the left, set the Content Width to Boxed.
Advanced users can click style and adjust the background of the section.
Step 5: Add Button and Spacers
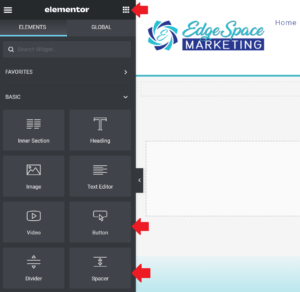
Click the Elements Icon, upper right of the Elementor panel.
Click on Spacer, then drag and drop it on the new section we just created.
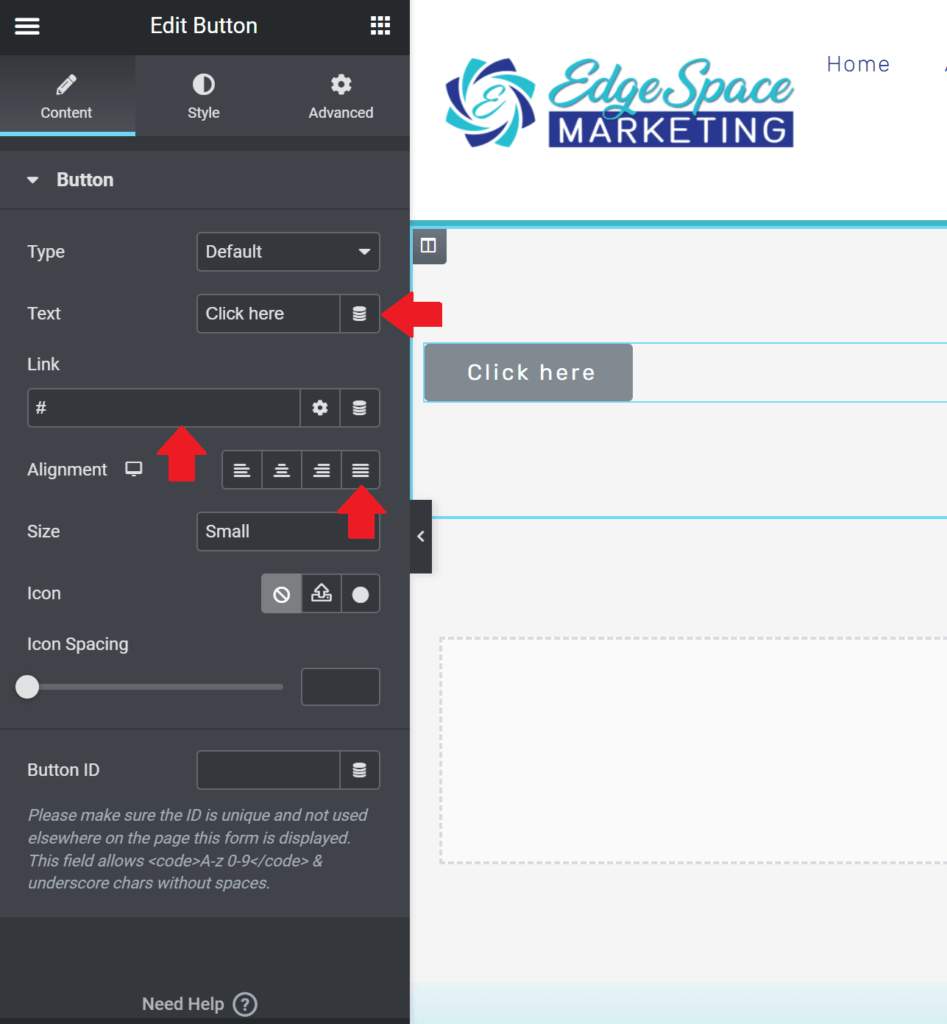
Click the Elements Icon, then Click on Button and drag and drop it under the Spacer. Repeat as needed.
Click the Elements Icon and add another spacer under the buttons.
From an aesthetic perspective, the spacers are needed so the buttons aren’t jammed right up to the header and footer.
Privacy Overview
| Cookie | Duration | Description |
|---|---|---|
| cookielawinfo-checkbox-analytics | 11 months | This cookie is set by GDPR Cookie Consent plugin. The cookie is used to store the user consent for the cookies in the category "Analytics". |
| cookielawinfo-checkbox-functional | 11 months | The cookie is set by GDPR cookie consent to record the user consent for the cookies in the category "Functional". |
| cookielawinfo-checkbox-necessary | 11 months | This cookie is set by GDPR Cookie Consent plugin. The cookies is used to store the user consent for the cookies in the category "Necessary". |
| cookielawinfo-checkbox-others | 11 months | This cookie is set by GDPR Cookie Consent plugin. The cookie is used to store the user consent for the cookies in the category "Other. |
| cookielawinfo-checkbox-performance | 11 months | This cookie is set by GDPR Cookie Consent plugin. The cookie is used to store the user consent for the cookies in the category "Performance". |
| viewed_cookie_policy | 11 months | The cookie is set by the GDPR Cookie Consent plugin and is used to store whether or not user has consented to the use of cookies. It does not store any personal data. |

